
Gel nails have become a go-to choice for anyone looking to achieve long-lasting, chip-resistant manicures that stay glossy for weeks. Whether you’re a salon regular or experimenting with DIY manicures at home, there’s no denying the appeal of gel nails. But what exactly makes them different from regular polish, and why are they so popular?
If you’re new to the world of gel, this guide breaks down the basics, compares gel to traditional polish, and shares tips for getting that flawless, salon-quality finish at home.
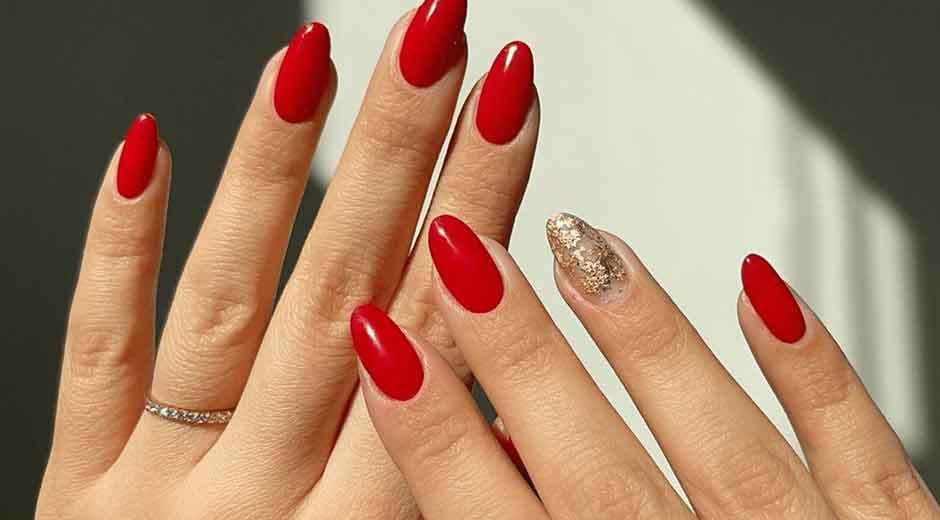
Gel Nails vs. Regular Polish: What’s the Difference?
At first glance, gel polish might look similar to traditional lacquer — but it’s much more advanced when it comes to performance. Regular nail polish air-dries over time and typically lasts a few days before chipping. In contrast, gel nails require curing under a UV or LED lamp, which hardens the polish into a glossy, durable finish that can last up to three weeks.
Some key differences:
- Dry Time:Traditional polish can take up to an hour to fully dry, while gel is instantly set after curing.
- Durability:Gel polish resists chips, smudges, and wear far better than standard options.
- Finish:Gel delivers a high-shine, salon-fresh look that lasts longer.
- Removal:While regular polish can be wiped off with remover, gels require soaking or careful filing to avoid damage.
If you want a manicure that holds up against busy schedules, frequent hand washing, and everyday wear and tear, gel is a great investment in both time and appearance.
How to Get Salon-Quality Gel Nails at Home
With the right tools and a little practice, achieving a flawless gel manicure at home is completely doable. Here are a few steps to help you master it:
- Prep Your Nails:Begin by cleaning and shaping your nails. Gently push back cuticles and buff the nail surface to create a smooth, even base.
- Apply Base Coat and Cure:Use a thin layer of gel base coat and cure under a UV or LED lamp as directed.
- Add Color:Apply two thin coats of your chosen gel polish, curing each layer thoroughly.
- Seal with Top Coat:Finish with a top coat to lock in shine and protect the polish. Cure once more.
- Customize Your Look:For extra flair, enhance your manicure with nail art charms — from metallic accents to crystals and decals, they’re an easy way to make your nails truly stand out.
- Explore Other Options:Not ready to commit to gel? A dip powder nail system can offer similar durability without the need for curing lamps.
Whether you’re embracing the high-shine finish of gel nails, experimenting with fun nail art charms, or exploring a dip powder nail look, Young Nails offers everything you need to create a stunning manicure from home.