
Skip to the good bit
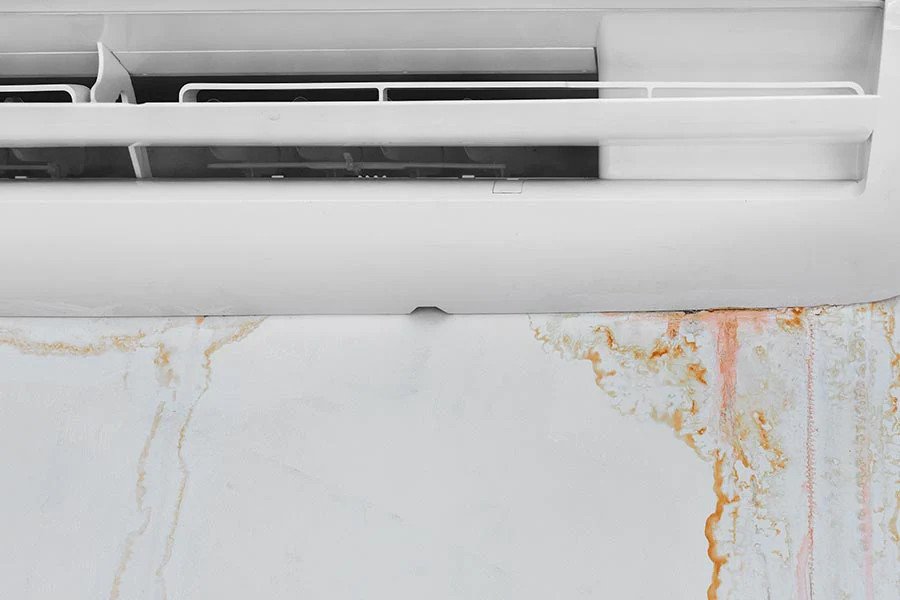
ToggleA mini split that leaks water from the front panel — dripping onto the floor, running down the wall, or spitting water droplets into the room — has a drainage problem, a frozen coil, or an installation problem that is causing condensate to escape the unit instead of flowing to the drain. The water you see on the front of the unit did not come from outside. It came from inside the unit. The evaporator coil behind the front cover produces condensate continuously during cooling operation. That water is supposed to drip into the internal drain pan, flow through the drain line, and exit outside. It is leaking from the front because the drain path is blocked, the drain pan is overflowing, or the blower wheel is physically throwing water forward.
The most common cause by a wide margin is a clogged condensate drain line. The second most common is a dirty air filter that has frozen the coil — the ice melts in an uncontrolled flood that overwhelms the drain pan. The third is a unit that is not level, tilting toward the front instead of toward the drain outlet. The fourth is a dirty blower wheel that is flinging condensed water off its blades and out the front vents. The fifth is a cracked or misaligned drain pan that no longer channels water to the drain. The first two causes are fixable by the homeowner. The last three may require a technician.
1. Clogged Condensate Drain Line: The Most Common Cause
The condensate drain on a wall-mounted mini split is a small PVC or vinyl tube — typically ⅝ inch or ¾ inch in diameter — that exits the indoor unit on the right or left side, runs through the wall bundle alongside the refrigerant lines, and drains outside. When algae, mold, dirt, or an insect nest clogs this line, water backs up into the drain pan inside the unit. The pan fills, overflows, and water drips from the lower edge of the front panel or runs down the wall below the unit.
The drain line must slope continuously downward from the indoor unit to the exit point. If the line sags or dips between the unit and the wall penetration, water pools in the low spot, algae grows in the standing water, and the clog forms at the sag point. This is an installation error, not a maintenance failure. The fix is to re-route the drain line to eliminate the sag or to install a drain line support clip that holds the line at a consistent downward angle.
To clear a clogged drain line, locate the drain outlet outside the house — typically a small plastic tube protruding from the wall near the outdoor condenser unit. Remove any cap or screen on the end of the tube. Use a wet-dry vacuum to suction the line from the outside end for 1 to 2 minutes. You should hear the vacuum pull air and water through the line. If the vacuum pulls a solid slug of algae and the line clears with a sudden whoosh, the clog is gone. Pour a cup of warm water mixed with a few drops of bleach into the drain pan behind the front cover to kill remaining algae inside the pan and the line.
Preventive maintenance: Pour a cup of warm water with a few drops of bleach into the mini split’s drain pan at the start of every cooling season. The bleach kills algae before it can establish a colony that clogs the line. This is a 5-minute task that costs pennies and prevents the most common mini split service call.
2. Dirty Air Filter: Frozen Coil, Then Front-Flooding Meltwater
A mini split air filter clogged with dust and pet hair restricts airflow across the evaporator coil. The coil temperature drops below freezing, ice forms on the coil fins, and the ice layer grows. When the unit cycles off or the homeowner turns it off because water is dripping, the ice melts rapidly. The volume of meltwater is far greater than the steady condensate drip that the drain pan and drain line are designed to handle. The pan overflows, and water leaks from the front of the unit.
The leaking pattern is distinctive: water appears intermittently, not continuously. It leaks in occasional bursts, often shortly after the unit cycles off or is turned off. The filter is visibly dirty when you open the front panel — matted with a gray layer of dust and lint. Clean the filter: lift the front panel, pull the filter tabs, rinse the filters under warm water until the water runs clear, and let them dry completely before reinstalling. If the coil is frozen — visible as frost or ice on the metal fins behind the filter — run the unit in FAN ONLY mode on high speed for 30 to 60 minutes to thaw the ice. Do not chip at the ice with a tool. A punctured evaporator coil is a $600 to $1,200 repair.
3. Unit Not Level: Water Flows Toward the Front Instead of the Drain
A wall-mounted mini split must be perfectly level side-to-side and slightly tilted toward the drain outlet — typically the right or left side, depending on where the installer routed the drain line. If the unit is tilted toward the front — even by a few degrees — condensate runs to the front edge of the drain pan, pools there, and eventually drips from the front panel instead of flowing toward the drain outlet at the side or the back.
The tilt can change over time. The mounting plate screws can loosen, the wall can shift slightly with seasonal humidity changes, or the unit can be bumped during cleaning. Place a bubble level on top of the indoor unit. The bubble should be centered side-to-side and slightly toward the drain side. If it is toward the front, the mounting plate must be adjusted. This requires removing the indoor unit from the mounting plate, loosening the plate screws, shimming the plate to the correct angle, and re-hanging the unit. Most homeowners should call a technician for this repair. If the unit has been tilted toward the front since installation, the installer made an error and should return to correct it under the workmanship warranty.
4. Dirty Blower Wheel Throwing Water Forward
The blower wheel — the cylindrical fan inside the mini split that pulls air across the evaporator coil and pushes it into the room — sits directly above the drain pan. When the blower wheel blades are coated with a thick layer of dust, mold, and lint, they become less efficient at moving air. Water droplets from the coil that should fall straight down into the drain pan are instead caught by the dirty blades and flung forward — out the front vents and onto the floor or the wall.
A mini split that spits water droplets from the front vents while the fan is running, rather than dripping from the bottom edge when the fan is off, has a dirty blower wheel. Cleaning the blower wheel requires removing the front cover, the drain pan, and in some models the entire blower housing — a 1- to 2-hour job for a technician. The cost is $150 to $300. This is not a DIY repair for most homeowners. The blower wheel must be removed, soaked in a cleaning solution, scrubbed with a soft brush, and reinstalled without bending any of the thin metal blades.
5. Cracked or Misaligned Drain Pan
The drain pan is a plastic tray that sits beneath the evaporator coil, catching the condensate that drips off the coil and channeling it to the drain outlet. A drain pan that has cracked — from age, thermal stress, or impact during cleaning — leaks water directly onto the front cover or down the wall. A drain pan that has shifted out of position no longer catches the water dripping from the coil, and the water falls past the pan onto the unit housing.
A cracked drain pan must be replaced. The part costs $30 to $80, but the labor to disassemble the indoor unit, remove the old pan, install the new one, and reassemble the unit takes 1 to 2 hours. The total cost is $200 to $500. A misaligned drain pan can sometimes be reseated without replacement — the pan has tabs or clips that hold it in position, and one of those may have come loose. This is a technician repair either way. The indoor unit must be partially disassembled to access the drain pan.
FAQ: Common Questions About Mini Split Water Leaks
Why is my mini split leaking in heating mode?
A mini split should not leak water from the indoor unit in heating mode. In heat mode, the indoor unit is the condenser — it releases heat into the room — and does not produce condensate. The outdoor unit produces condensate in heat mode and may drip water or develop frost that melts during defrost cycles. If the indoor unit is leaking in heating mode, water from outdoors is entering the drain line — possibly from rain, snowmelt, or a disconnected outdoor drain — and backing up into the indoor unit. The outdoor end of the drain line should have a downward-facing elbow or a screen to prevent water and insects from entering.
The leak started right after I ran the self-clean function. Is that normal?
The self-clean function runs the indoor fan after the compressor stops to dry the evaporator coil. It does not produce water — it evaporates residual moisture. If water appears immediately after a self-clean cycle, the cycle did not cause the leak. The leak was already present but was not visible because the fan was not running. The self-clean cycle’s fan blew the pooled water out the front of the unit, making a pre-existing drain problem visible for the first time. The drain line was already clogged. The self-clean cycle just revealed it.
Clean the Filter, Clear the Drain, Check the Level
A mini split leaking from the front has water that cannot reach the drain. The drain is clogged. The coil is frozen and melting in floods. The unit is tilted the wrong way. The blower wheel is flinging water forward. The drain pan is cracked.
Clean the filter first — it costs nothing, takes 5 minutes, and solves the problem if the leak is from a frozen coil. Clear the drain line with a wet-dry vacuum. Check the unit’s level with a bubble level. If those three steps do not stop the leak, the problem is the blower wheel or the drain pan, and a technician visit costs $150 to $500. The five-minute bleach-and-water flush at the start of every cooling season prevents the drain clog that causes the majority of front-leaking service calls. The best repair is the one you never need.