
Skip to the good bit
ToggleCounter flashing is the top layer of metal flashing that covers and protects the base flashing at a roof-to-wall intersection — typically at a chimney, a parapet wall, or a dormer sidewall. It is embedded into the vertical surface (cut into a mortar joint on brick, or tucked behind siding on a wood-framed wall) and hangs down over the base flashing below it like a curtain. Its sole job is to prevent water from getting behind the base flashing.
Base flashing — step flashing or continuous flashing — directs water down the roof. Counter flashing covers the top of the base flashing so water running down the wall cannot blow behind it. Without counter flashing, a wind-driven rain at 40 mph pushes water up and over the top edge of the base flashing, into the wall cavity, and down through the ceiling below. The base flashing handles gravity-fed water. The counter flashing handles wind-driven water. Both are required for a waterproof roof-to-wall junction.
Where Counter Flashing Is Used on a Roof
Counter flashing is installed at every location where a vertical surface meets the roof and the top edge of the base flashing would otherwise be exposed to wind-driven rain. The three most common locations are:
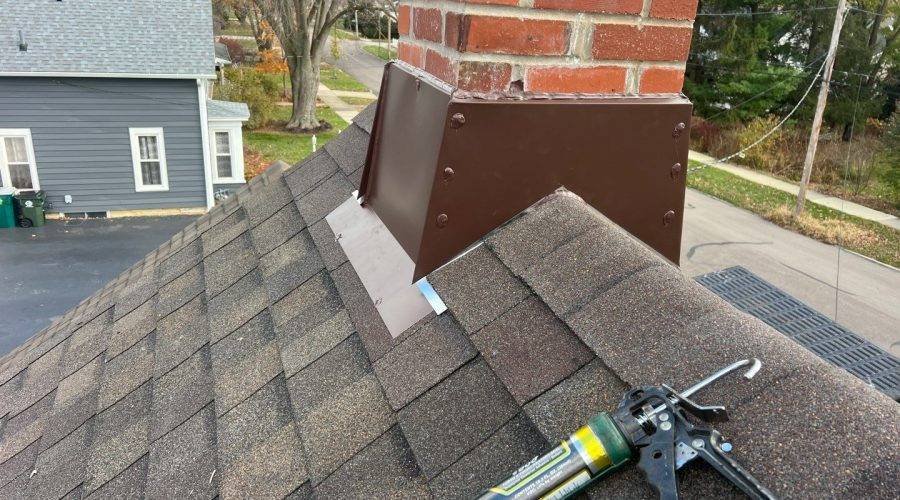
- Chimneys. The single most common counter flashing location — and the one where it fails most often. The counter flashing around a chimney is typically cut into a groove in the mortar joints (called a reglet) and sealed with mortar, silicone, or lead wedges. The base step flashing is installed on the roof side first, and the counter flashing is then embedded into the brick above it, hanging down over the step flashing by at least 2 inches.
- Parapet walls. On a flat roof, the membrane runs up the inside face of the parapet wall and is terminated with a metal coping cap at the top. The coping cap is counter flashing — it covers the top edge of the membrane and prevents water from getting behind the membrane at the wall-roof junction.
- Dormer sidewalls and wall-to-roof intersections on sloped roofs. On a sided wall, the siding itself acts as the counter flashing. The step flashing’s vertical leg tucks behind the house wrap and the bottom edge of the siding. The siding hangs down over the top of the step flashing and serves the same water-shielding function as metal counter flashing on a chimney.
Counter Flashing vs. Step Flashing vs. Base Flashing: What Is the Difference?
The confusion between counter flashing and its related components is understandable — they all work together at the same roof junction and are often made of the same metal. The difference is where they sit and what they protect against.
| Flashing Type | Position | Protects Against | Attached To |
| Step Flashing (Base Flashing) | Under shingles, against wall | Gravity-driven water running down the wall | Roof deck (nailed under shingles) |
| Counter Flashing | Over step flashing, embedded in wall | Wind-driven rain blowing behind the step flashing | Wall (mortar joint or behind siding) |
| Apron Flashing | Bottom of chimney, over shingles | Water flowing down roof hitting the chimney face | Roof deck and chimney face |
| Head Flashing | Top of chimney or skylight, over roofing | Water flowing down chimney face onto roof | Roof deck, over roofing material |
The test to distinguish them in the field: if you can lift the bottom edge of the metal and see the shingle or roofing material underneath, it is counter flashing. If the metal is under the shingles or under the roofing material and you cannot lift it without removing the roofing, it is base flashing. Counter flashing hangs over. Base flashing is buried under.
The two-inch overlap rule: Counter flashing must overlap the base flashing by at least 2 inches. If a wind-driven rain blows water up the wall and over the top edge of the base flashing, the water hits the back of the counter flashing and runs down onto the base flashing, then onto the roof. If the overlap is less than 2 inches, the wind can blow water past the gap. Building codes specify this minimum overlap for a reason — it is the difference between a watertight assembly and one that leaks every time the wind picks up.
How Counter Flashing Is Installed: Reglet vs. Surface-Mount
Counter flashing is installed in one of two ways: cut into the wall (reglet method) or attached to the surface of the wall (surface-mount method). The reglet method is the only one that lasts.
Reglet-mounted counter flashing is cut into a horizontal groove in the mortar joint of a brick or stone chimney or wall. The groove is ¾ to 1 inch deep and follows the mortar joint, which is softer and easier to cut than the brick itself. The top edge of the counter flashing is bent into an L-shape and inserted into the groove, then sealed with mortar, a lead wedge, or a bead of high-quality silicone. The reglet mechanically locks the counter flashing into the wall — it cannot pull out without breaking the sealant or the mortar wedge.
Surface-mounted counter flashing is screwed or nailed to the face of the chimney or wall and sealed with a bead of caulk along the top edge. It relies entirely on the sealant to keep water from getting behind it. Surface-mounted counter flashing fails predictably: the sealant degrades under UV exposure and thermal cycling, cracks open, and admits water. The flashing itself is still intact, but the sealant joint is not. Surface-mount is a budget repair method, not a permanent installation.
A reglet-mounted counter flashing lasts 30 to 50 years if the mortar or sealant is maintained every 10 to 15 years. A surface-mounted counter flashing lasts 5 to 10 years before the sealant fails and requires re-caulking. The cost difference between the two methods is roughly $300 to $600 in labor — the mason’s time to cut the reglet groove. Paying that premium once during a roof replacement or a chimney rebuild is cheaper than re-caulking the surface-mount flashing every 8 years for the next 40 years.
Why Counter Flashing Fails and How to Recognize the Problem
Counter flashing fails in three predictable ways, and all three produce the same symptom: a ceiling stain near a chimney or a wall on the top floor.
- The reglet sealant or mortar deteriorates. Mortar in a chimney reglet cracks from thermal cycling. Silicone pulls away from the brick over 10 to 15 years. Water enters the groove, runs behind the counter flashing, and drips down onto the step flashing below. The step flashing is intact and would shed the water if the water stayed on top of it — but the water is now behind it, running down the wall cavity.
- The counter flashing lifts out of the reglet. Wind vibration, building settlement, or freeze-thaw cycles in the mortar joint can physically loosen the metal from the groove. The counter flashing pulls away from the wall by a quarter-inch — enough for wind-driven rain to blow behind it. The flashing looks fine from the ground, but it is no longer performing its function.
- The counter flashing corrodes at the bend. The bend where the metal turns from the vertical wall leg to the drip edge that hangs over the base flashing is a stress point. Water collects at the bend, pollutants accumulate, and the metal thins over decades until a pinhole develops. Copper and stainless steel counter flashing resist this failure mode entirely. Galvanized steel counter flashing develops pinholes at the bend after 20 to 30 years.
Counter Flashing Repair and Replacement Costs
Replacing counter flashing on a chimney costs $600 to $1,800 depending on chimney size, accessibility, and whether a reglet needs to be re-cut. The cost includes removing the old counter flashing, cutting a new reglet groove if the existing one is deteriorated, fabricating new metal pieces, installing them in the reglet, and sealing the groove with mortar or silicone.
Replacing counter flashing on a parapet wall or a dormer sidewall is usually done as part of a larger roof replacement and is not priced as a standalone repair. Re-caulking existing surface-mounted counter flashing — a maintenance task, not a replacement — costs $150 to $400. The roofer scrapes out the old caulk, cleans the metal and the wall surface, and applies a new bead of exterior-grade sealant along the top edge of the flashing.
FAQ: Common Questions About Counter Flashing
Should counter flashing be visible from the ground?
Yes. Counter flashing on a chimney should be visible as a metal band cut into the brick at the roofline, hanging down over the shingles or the step flashing below it. If you cannot see a metal line at the base of your chimney, the counter flashing is either missing or buried under sealant — both are problems.
Can I paint counter flashing to match the chimney or wall?
You can paint metal counter flashing with an exterior-grade metal primer and paint, but the paint will peel and require repainting every 3 to 5 years. Galvanized steel and aluminum accept paint well. Copper and stainless steel do not — paint does not adhere properly to their surfaces without an acid-etch primer. Copper counter flashing is typically left unpainted to develop its natural green patina, which many homeowners prefer to a painted metal band.
Counter Flashing Is the Difference Between a Watertight Chimney and a Chronic Leak
The base flashing keeps water that runs down the wall on the outside of the roof. The counter flashing keeps wind-driven water from blowing behind the base flashing. Both are required. A chimney or a wall-to-roof junction with only base flashing will leak in every wind-driven rain. A junction with only counter flashing and no base flashing will leak as soon as water runs down the wall.
If you are replacing a roof or repairing a chimney, insist on reglet-mounted counter flashing cut into the mortar joint — not surface-mounted flashing with a bead of caulk along the top. The reglet costs more on installation day. The caulk job costs more over the life of the roof.