Skip to the good bit
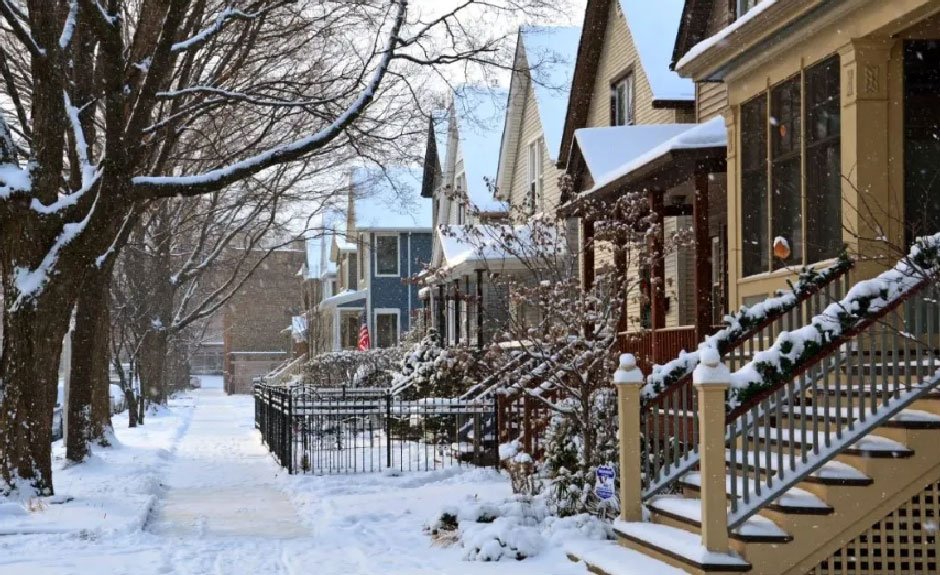
ToggleChicago winters are no joke. With temperatures that can drop well below freezing and windchills that make it feel even colder, your furnace needs to be ready for the challenge. A furnace readiness checklist helps ensure your heating system runs smoothly all winter long. By following seven simple steps before the cold hits, you can avoid emergency breakdowns, save money on energy bills, and keep your family warm when temperatures plummet. The best part? Most of these tasks take less than an hour and can prevent costly repairs down the road.
Quick Reference: Furnace Readiness Checklist
| Task | Timing | Difficulty | Time Needed |
| Replace air filter | Monthly during winter | Easy | 5 minutes |
| Test thermostat | Before first cold snap | Easy | 10 minutes |
| Clear vents and registers | Early fall | Easy | 20 minutes |
| Check carbon monoxide detectors | Start of heating season | Easy | 15 minutes |
| Inspect furnace area | Before turning on heat | Easy | 10 minutes |
| Schedule professional inspection | Early fall | N/A | 1-2 hours |
| Test safety switches | Before winter | Moderate | 30 minutes |
Why Chicago Homes Need Special Furnace Preparation
Chicago’s extreme weather puts unique stress on heating systems. The city experiences an average of 24 days below 10°F each winter. Your furnace might run continuously for days during polar vortex events. This constant operation can expose any weakness in your system.
The rapid temperature swings Chicago faces also challenge furnaces. One day might be 40°F, and the next could drop to -10°F. These dramatic changes force your heating system to work harder than in cities with more stable climates. Without proper preparation, this stress leads to breakdowns when you need heat most.
Additionally, Chicago’s old housing stock presents challenges. Many homes have aging ductwork, poor insulation, and outdated heating systems. These factors make a thorough furnace readiness checklist even more critical for surviving brutal Midwest winters.
Step 1: Replace Your Furnace Filter
The single most important item on any furnace readiness checklist is filter replacement. A clean filter keeps your system running efficiently and prevents overheating. Dirty filters force your furnace to work harder, increasing energy bills and wear on components.
During Chicago winters, check your filter monthly. The furnace runs more frequently, pulling in more dust and debris. Look for these signs that indicate immediate filter replacement:
- Visible dirt buildup on the filter surface
- Gray or black discoloration
- Difficulty seeing light through the filter
- Increased dust around your home
Choose the right filter for your needs. Basic fiberglass filters cost less but need monthly replacement. Pleated filters last longer and capture more particles. For the best protection, consider HEPA filters, though these may restrict airflow in older systems.
Mark filter changes on your calendar. Set phone reminders for the first of each month during heating season. Keep spare filters on hand so you’re never caught without one during a cold snap.
Step 2: Test Your Thermostat Settings
Your thermostat controls your entire heating system, making it crucial to your furnace readiness checklist. Start by switching from cooling to heating mode. Set the temperature five degrees above the current room temperature. Your furnace should start within a few minutes.
Listen for unusual sounds when the system starts. A properly functioning furnace makes a gentle whoosh as it ignites. Loud bangs, persistent clicking, or grinding noises indicate problems. If you hear these sounds, professional service is needed before winter arrives.
Test all programmable features if you have a digital thermostat. Verify that scheduled temperature changes work correctly. Replace batteries if your thermostat uses them. Weak batteries can cause erratic operation or complete system failure during cold weather.
Consider upgrading to a smart thermostat. These devices learn your schedule and adjust temperatures automatically. They can save 10-20% on heating bills while maintaining comfort. Many models send alerts about filter changes and maintenance needs.
Step 3: Clear All Vents and Registers
Blocked vents create hot spots in your furnace and reduce heating efficiency. Walk through every room as part of your furnace readiness checklist. Remove furniture, curtains, and rugs blocking supply and return vents. Even partial blockages force your system to work harder.
Clean each vent cover thoroughly. Remove them if possible and wash with soap and water. Vacuum inside the ducts as far as your attachment reaches. Built-up dust reduces airflow and spreads allergens throughout your home. This task becomes especially important before closing up the house for winter.
Check dampers in your ductwork if accessible. These metal plates control airflow to different areas. Ensure they’re open for the rooms you want to heat. Close dampers to unused spaces like storage rooms. This simple adjustment improves comfort and reduces heating costs.
Never close more than 20% of your vents. Doing so creates pressure imbalances that can damage your furnace. If certain rooms are always too hot or cold, the solution isn’t closing vents. Instead, consider professional duct balancing or zone control systems.
Step 4: Inspect and Test Safety Equipment
Carbon monoxide detection is a critical part of any furnace readiness checklist. This invisible, odorless gas can be deadly. Test all carbon monoxide detectors in your home. Replace batteries even if the test works. Install detectors on every level and near sleeping areas.
Check the manufacture date on your detectors. Most units last 5-7 years before needing replacement. Don’t risk your family’s safety with outdated equipment. Modern detectors provide digital readouts of CO levels, offering better protection than older models.
Inspect your furnace’s flame sensor and safety switches. The flame should burn steady and blue. Yellow or flickering flames indicate combustion problems. The furnace should shut off immediately if you open the access panel. This safety switch prevents operation when the unit is open.
Review your fire extinguisher’s pressure gauge and expiration date. Keep one near your furnace room, but not directly next to the unit. Know how to shut off the gas to your furnace in emergencies. Locate the gas valve and ensure it turns easily.
Step 5: Clear the Furnace Area
Your furnace needs breathing room to operate safely. Remove all stored items from around the unit. The area within three feet should be completely clear. This includes boxes, cleaning supplies, paint cans, and anything flammable. Good airflow prevents overheating and reduces fire risk.
Vacuum or sweep the furnace room thoroughly. Dust and debris can be pulled into your system, clogging filters faster. Pay special attention to the area around the furnace’s air intake. Some furnaces pull combustion air from the room, making cleanliness even more important.
Check for signs of rust, water damage, or corrosion around your furnace. These indicate moisture problems that need immediate attention. Look at the vent pipe for rust or white residue. These signs suggest improper venting that requires professional evaluation.
Ensure adequate lighting in your furnace room. You need to see clearly for maintenance tasks and emergency situations. Replace burnt-out bulbs and consider adding a flashlight to the area. Good visibility helps you spot problems before they become emergencies.
Step 6: Schedule Professional Maintenance
While DIY tasks are important, professional inspection remains essential to your furnace readiness checklist. Technicians have the tools and expertise to catch problems you might miss. They clean components you can’t access and test safety controls thoroughly. Annual maintenance typically pays for itself through improved efficiency and fewer repairs.
During professional maintenance, technicians perform numerous critical tasks:
- Clean and adjust burners for optimal combustion
- Lubricate all moving parts to reduce wear
- Check the heat exchanger for dangerous cracks
- Test gas pressure and connections
- Measure airflow and static pressure
- Verify proper venting and combustion air
Schedule maintenance in early fall before the heating rush. Waiting until the first cold snap means longer wait times and possible discomfort. Many companies offer maintenance agreements that include priority service and repair discounts. These agreements provide peace of mind during harsh Chicago winters.
Keep maintenance records for warranty purposes and future reference. Note any recommendations or concerns the technician mentions. This information helps track your system’s health over time and plan for eventual replacement.
Step 7: Create Your Winter Emergency Kit
The final item on your furnace readiness checklist involves preparing for worst-case scenarios. Chicago winters can bring power outages and heating failures. A well-stocked emergency kit keeps your family safe until help arrives or power returns.
Your heating emergency kit should include:
- Extra blankets and warm clothing for each family member
- Portable space heaters (use only models designed for indoor use)
- Flashlights and batteries for navigating dark furnace rooms
- Contact information for heating contractors and utility companies
- Carbon monoxide detectors with battery backup
- First aid supplies, including treatment for hypothermia
Know how to safely restart your furnace after power outages. Many modern furnaces require a manual reset after losing power. Locate your owner’s manual and keep it accessible. If you can’t find it, download a digital copy from the manufacturer’s website.
Plan alternative heating strategies for extended outages. Identify the smallest room in your home that can be sealed off and heated efficiently. Stock non-perishable food that doesn’t require cooking. Keep cell phones charged and have backup power banks available.
The Cost of Skipping Furnace Preparation
Ignoring your furnace readiness checklist can lead to expensive consequences. Emergency repairs during Chicago winters often cost double the normal rates. Service companies charge premium prices for night and weekend calls. Parts may be scarce during cold snaps, leading to longer wait times.
A neglected furnace uses 20-30% more energy than a well-maintained system. For an average Chicago home, this means hundreds of extra dollars each winter. Dirty filters alone can increase heating bills by 15%. These costs add up quickly during long Midwest winters.
More seriously, poor maintenance creates safety hazards. Cracked heat exchangers leak carbon monoxide into your home. Clogged vents cause dangerous backdrafting. Neglected furnaces have a higher fire risk. These dangers make prevention through proper maintenance essential for your family’s safety.
Common Furnace Problems in Chicago Winters
Understanding typical issues helps you use your furnace readiness checklist more effectively. Frozen condensate lines plague high-efficiency furnaces during extreme cold. These pipes drain water from your furnace and can freeze in unheated areas. Insulating these lines prevents frozen blockages.
Thermostat problems increase during winter due to temperature extremes. Poor placement near drafts or heat sources causes erratic operation. Dead batteries leave you without heat at the worst times. Smart thermostats sometimes lose WiFi connection during storms, defaulting to basic operation.
Dirty flame sensors cause many winter furnace failures. This small component tells your furnace that the burners are lit. When coated with residue, it can’t sense the flame properly. The furnace shuts down for safety, leaving you cold. Regular cleaning prevents this common issue.
Frequently Asked Questions
How often should I complete a furnace readiness checklist? Perform a full inspection annually before heating season begins. However, some tasks need more frequent attention. Change filters monthly during winter, test carbon monoxide detectors monthly, and visually inspect your furnace whenever you change the filter.
What temperature should I set my thermostat to in Chicago winters? The Department of Energy recommends 68°F when you’re home and awake. Lower it 7-10 degrees when sleeping or away. Every degree of reduction saves about 3% on heating bills. Find the balance between comfort and efficiency that works for your family.
Can I complete furnace maintenance myself? Basic maintenance, like filter changes and cleaning vents, is perfect for DIY. However, tasks involving gas connections, electrical work, or internal furnace components require professional service. Never attempt repairs beyond your skill level, especially with gas appliances.
When should I replace my furnace instead of repairing it? Consider replacement when your furnace is over 15 years old and facing major repairs. If repair costs exceed 50% of replacement cost, upgrading makes sense. Frequent breakdowns, rising energy bills, and uneven heating also indicate replacement time.
How long do furnaces typically last in Chicago? With proper maintenance, furnaces last 15-20 years in Chicago’s climate. However, units that run constantly during harsh winters may wear faster. Regular maintenance following your furnace readiness checklist extends lifespan and improves reliability throughout ownership.
Stay Warm and Safe This Winter
Your furnace readiness checklist is more than just a maintenance routine – it’s your insurance policy against Chicago’s brutal winters. By taking these seven steps before the cold arrives, you protect your home, save money, and ensure your family’s comfort all season long. Remember that prevention costs far less than emergency repairs during a January cold snap. Start your furnace preparation early, stay consistent with maintenance, and don’t hesitate to seek professional help when needed. With proper care and attention, your heating system will keep you warm through even the harshest Midwest weather.


