Skip to the good bit
ToggleDon’t Let Silent Water Damage Destroy Your Home
Hidden plumbing leaks are every homeowner’s nightmare. They silently work behind walls, under floors, and in crawl spaces, causing thousands of dollars in damage before you even know they exist. The average household wastes over 10,000 gallons of water annually due to undetected leaks, making plumbing leak detection a critical skill for every property owner.
The Hidden Problem Costing You Money Every Day
Water damage from hidden leaks affects over 14,000 people daily in the United States. These sneaky problems start small but quickly escalate into major disasters. Your water bill might increase by 35% or more when hidden leaks go undetected for months.
The worst part? Most homeowners don’t realize they have a problem until it’s too late. By then, mold growth, structural damage, and sky-high water bills have already taken their toll.
Why Hidden Leaks Are More Dangerous Than You Think
Unlike obvious leaks that drip visibly, hidden leaks work in silence. They create the perfect environment for mold growth within 24-48 hours. Mold remediation alone can cost between $1,500 and $15,000, not including the structural repairs needed afterward.
Hidden leaks also waste precious water resources. A single small leak can waste over 3,000 gallons per year. When you multiply that by millions of homes, the environmental impact becomes staggering.
Early Warning Signs Your Home Has Hidden Leaks
Unexplained Water Bill Increases
Your water bill provides the first clue about hidden leaks. A sudden 25% increase without changed usage patterns typically indicates a leak somewhere in your system. Track your monthly usage to spot these red flags early.
Compare your current bill to the same month last year. If you’re using significantly more water without lifestyle changes, start investigating immediately.
Musty Odors and Moisture Problems
Persistent musty smells often signal hidden water problems. These odors develop when moisture accumulates in enclosed spaces like wall cavities or under flooring. Pay special attention to basements, crawl spaces, and areas around plumbing fixtures.
High humidity levels in normally dry areas also indicate hidden moisture sources. Use a hygrometer to monitor humidity levels throughout your home.
Mysterious Stains and Discoloration
Water stains on walls, ceilings, or floors reveal hidden leak locations. These stains often appear yellow, brown or have a ring-like pattern. Even small stains can indicate significant water damage behind surfaces.
Peeling paint or wallpaper also suggests moisture problems. Water weakens adhesives and causes decorative finishes to fail prematurely.
Professional Plumbing Leak Detection Methods You Can Use
The Water Meter Test
Turn off all water-using appliances and fixtures in your home. Check your water meter reading and wait one hour without using any water. If the meter reading changes, you definitely have a leak somewhere.
This simple test costs nothing but provides definitive proof of hidden leaks. Write down the exact meter reading and check it again after the waiting period.
Food Coloring Toilet Test
Add a few drops of food coloring to your toilet tank. Wait 15 minutes without flushing. If colored water appears in the bowl, your toilet has an internal leak that needs immediate attention.
Toilet leaks are among the most common hidden water wasters. A leaking toilet can waste up to 200 gallons daily without making any obvious noise.
Listening for Hidden Sounds
Use a mechanic’s stethoscope or simply press your ear against walls near plumbing lines. Running water sounds when no fixtures are active indicate hidden leaks. Focus on areas behind toilets, under sinks, and along main water lines.
Water hammering or unusual gurgling sounds also suggest plumbing problems that need investigation.
Advanced Detection Techniques for Serious Leaks
Thermal Imaging Technology
Infrared cameras detect temperature differences caused by water leaks. Cool spots on walls or floors often reveal hidden moisture that’s not visible to the naked eye. Many home improvement stores rent thermal cameras for DIY detection.
Professional-grade thermal imaging provides the most accurate results. However, smartphone thermal camera attachments offer a budget-friendly alternative for basic detection needs.
Electronic Leak Detection Devices
Moisture meters measure water content in walls, floors, and other surfaces. Readings above 20% typically indicate water damage or active leaks. These devices help pinpoint exact leak locations without destructive investigation.
Acoustic leak detection equipment amplifies sound to locate pressurized water leaks. This technology works particularly well for slab leaks and underground pipe problems.
Step-by-Step Leak Detection Process
Visual Inspection Checklist
Start with areas most prone to leaks: under sinks, around toilets, near water heaters, and in basements. Look for water stains, mineral deposits, rust, or any signs of moisture. Check pipe joints and connections carefully.
Examine walls and ceilings for discoloration, soft spots, or bubbling paint. These visual cues often reveal hidden problems before they become catastrophic.
Testing Water Pressure Changes
Unusual pressure drops during normal use suggest leak problems. If your shower pressure decreases significantly when someone flushes a toilet, you might have a hidden leak affecting your system’s pressure.
Document pressure changes throughout the day. Consistent patterns help identify leak locations and severity levels.
Common Hidden Leak Locations and How to Fix Them
Behind Bathroom Fixtures
Toilets, tubs, and showers frequently develop hidden leaks around seals and connections. Remove the toilet base trim and check for moisture or water damage around the base and behind the toilet.
Fix minor toilet leaks by replacing the wax ring seal. Shower and tub leaks often require re-caulking or fixing loose tile grout that allows water penetration.
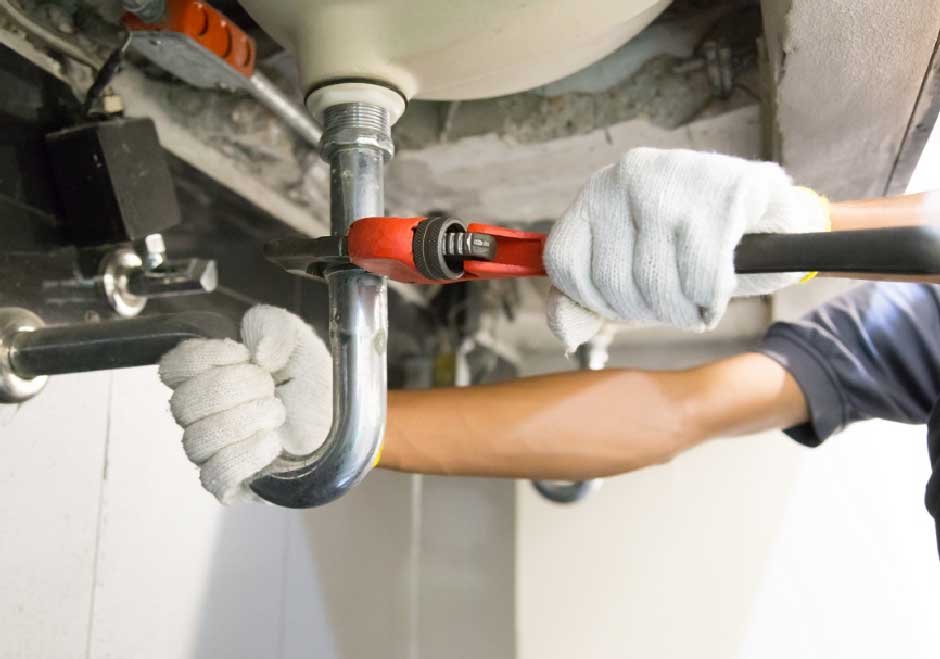
Under Kitchen Sinks
Garbage disposals, dishwasher connections, and sink drain assemblies commonly leak. Check all visible pipes and connections under your sink weekly for signs of moisture or corrosion.
Tighten loose connections with appropriate tools. Replace corroded pipes before they fail completely and cause extensive water damage.
Inside Wall Cavities
Pipes running through walls can develop leaks that go unnoticed for years. Use moisture meters to test wall areas near plumbing lines for elevated moisture levels.
Small wall leaks might require only pipe joint repairs. Extensive damage may necessitate opening walls for complete pipe replacement and drywall repair.
Under Concrete Slabs
Slab leaks occur when pipes under concrete foundations develop problems. Listen for running water sounds when no fixtures are active and watch for unexplained warm spots on floors.
Slab leak repairs often require professional excavation and pipe rerouting. Early detection prevents extensive concrete damage and foundation problems.
DIY Repair Techniques for Common Leaks
Temporary Emergency Fixes
Pipe clamps provide quick temporary solutions for small pipe leaks. Wrap the damaged area with rubber and secure it tightly with metal clamps until permanent repairs can be made.
Plumbing epoxy putty works well for hairline cracks in accessible pipes. Clean the area thoroughly and apply the putty according to the manufacturer’s instructions.
Permanent Repair Solutions
Replace damaged pipe sections using appropriate fittings and materials. Always turn off the water supply and drain pipes completely before beginning any repair work.
Use pipe thread compound on threaded connections to prevent future leaks. Hand-tighten first, then use wrenches for final tightening without over-torquing.
Prevention Strategies to Avoid Future Problems
Regular Maintenance Schedule
Inspect visible plumbing monthly for signs of wear, corrosion, or loose connections. Replace aging supply lines and hoses every 5-7 years before they fail catastrophically.
Annual professional inspections catch problems early when repairs cost less than major damage restoration.
Water Pressure Management
Excessive water pressure strains pipes and increases leak risk. Install pressure-reducing valves if your home pressure exceeds 80 psi. Proper pressure extends pipe life significantly.
Monitor pressure regularly with inexpensive gauges available at hardware stores. Consistent monitoring helps identify pressure-related problems before they cause leaks.
When to Call Professional Help
Complex Detection Needs
Professional plumbing leak detection services use specialized equipment unavailable to homeowners. Thermal cameras, acoustic detectors, and pressure testing equipment provide accurate leak location without destructive investigation.
Licensed professionals also carry insurance coverage for any accidental damage during detection processes.
Extensive Repair Requirements
Major pipe replacements, slab leak repairs, and structural damage restoration require professional expertise. Attempting complex repairs without proper knowledge often creates bigger problems and more expensive solutions.
Professional repairs also include warranties and code compliance guarantees that protect your investment.
Protecting Your Home from Water Damage
Hidden plumbing leaks pose serious threats to your home’s structural integrity and your family’s health. Effective plumbing leak detection requires combining multiple detection methods with regular maintenance and prompt repairs.
The key to minimizing damage lies in early detection and quick action. By implementing these detection techniques and maintaining vigilant monitoring, you can catch hidden leaks before they destroy your property and drain your wallet.
Remember that water damage prevention costs far less than restoration after major leaks occur. Stay proactive, use these detection methods regularly, and address problems immediately when discovered.